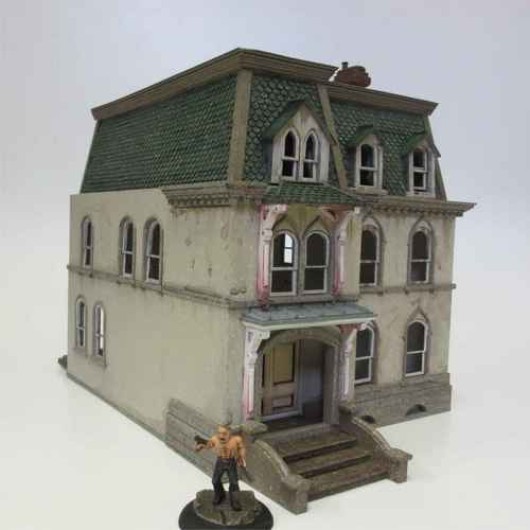
Griffin House

Griffin House

Griffin House is our first kit for the planned Arkham Avenue range of scenery & buildings and as such it's been something of a learning curve for us in terms of producing an architecturally interesting model that's also easily assembled by the average hobby modeller. Hopefully the following instructions will allow you to work through construction without too many difficulties!

Assembly of the main wall structure is essentially alphabetical, working anti-clockwise for a left-handed building, or clockwise for a right-handed building.

Tutorial Steps

  • step
    1
    Griffin House

    Cut pieces from the carrying sheet(s) with a craft knife. Tabs left behind should be cleaned with a sanding block or file to leave a clean, square edge.

  • step
    2
    Griffin House

    Assemble walls sequentially in alphabetical order. Ground floor sequence is G-H-I-J-K-L; first floor sequence is A-B-C-D-E-F; second floor (roof) is M-N-O-P-Q-R.

    Letters should face outwards (and will be hidden by styrene elevations at a later stage).

  • step
    3
    Griffin House

    Fix finger joints in place, supporting with weighted angles or engineer's squares, applying glue to joints.

  • step
    4
    Griffin House

    Note that ground floor part J should have a drop-down section corresponding to the door cutout in part H, to allow the 1st floor plate to sit properly.

  • step
    5
    Griffin House

    Support joints with masking tape while glue dries to full strength.

    Check assembled floors for fit before final setting.

  • step
    6
    Griffin House

    Fit floor support tags as required into wall slots. Note that fitting tags at ground floor ceiling level (see picture above) will prevent removal of the ground floor plate, so this MUST be fitted first.

  • step
    7
    Griffin House

    Fit ground floor plate. Glue in place for permanent fit and to strengthen the overall structure. Tags at ceiling level can be left unglued for optional removal at a later stage.

  • step
    8
    Griffin House

    Dry fit ground floor ceiling/ first floor but do not glue in place. Stair placement holes can be punched out at this stage or left until later in construction.

  • step
    9
    Griffin House

    Remove styrene elevations from the carrier sheet; clean edges with sanding block.

    Laser cutting leaves a slight burr around the cut edges. This can be removed by gently  cutting with a knife blade held at right angles to the edge (see the curling swarf top right of the picture).

    Alternately, sand off the burr using wet-n-dry sandpaper and block.

  • step
    10
    Griffin House

    After making sure the cutting burr is removed from both sides of the styrene, use plastic solvent to pre-soften the rear-side of the elevation.

  • step
    11
    Griffin House

    Fit elevations one at a time, applying generous solvent to the rearside and then quickly offering up and aligning with existing window/door cutouts. Apply more solvent at cut edges and make sure styrene is sealed to the plywood surface.

  • step
    12
    Griffin House

    Seal all corners and edges with solvent and leave aside to dry thoroughly. Note porch entrance section slid into place with walls assembled).

    Repeat process for 1st floor section.

  • step
    13
    Griffin House

    Dry-fit both floors together to check for square with internal floors unglued.

    Once glue is thoroughly dry, smooth edges where necessary with a sanding block and medium grade wet-n-dry paper.

  • step
    14
    Griffin House

    Cut thin trims from sheet and glue to styrene elevations with liberal amounts of solvent. Align upper (straight) edges with engraved lines on the outside elevations so that tabbed lower edges protrude past the bottom edge of the first floor section. This will form a skirt to hide the joint between floors when assembled.

    Fit lower trims flush with bottom edge of building and build up thicknesses of ashlar bonded stonework details in two layers, using wood glue or cyano. Sand corners flush once trims have dried properly, seal edges with thin cyano if necessary.

  • step
    15
    Griffin House

    Glue window sills and door trims into place using wood glue or cyano.

  • step
    16
    Griffin House

    Take fancy cornice details and sand flat on a sheet of wet-n-dry taped to a board. Glue in place around upper front elevations of the first floor section. A combination of superglue (for instant bonding) and subsequently applied solvent (for strength) should be used.

    Fill any cracks or joints as necessary with car body filler, milliput, etc.

  • step
    17
    Griffin House

    Take resin door surrounds, front and rear steps, and porch floor, and sand off excess flash to form flat surfaces for bonding. Dry fit for now to check for good fit - you 'll find it far easier to paint these pieces separately and assemble at a later stage.

  • step
    18
    Griffin House

    Assemble roof sections in alphabetical order.

    DO NOT fit roof support tags at this stage.

  • step
    19

    Dry fit rooftop from TOP of roof wall sections. Turn roof assembly over and fit support tags below rooftop. Once all tags are in position, turn roof assembly right side up and gently push the make sure the roof is in contact with all tags. Now turn roof upside down again and glue tags and roof at points of contact.

    Set aside to dry thoroughly.

  • step
    20
    Griffin House

    Fit chimney casting to slot in right hand side of roof - cyano will make the strongest bond.

  • step
    21
    Griffin House

    Cut strips of tile from carrier sheet. Deburr cut edges as before with sanding block or scalpel held at 80-degree angle. Offer up strip to chimney edge, mark length with pencil and cut to size. Glue tile to roof carcass with solvent cement.

  • step
    22
    Griffin House

    Cut second strip of tiles and chop first tile in half so that overlapping tiles are properly positioned in alternating rows. Trim to length and glue row into place.

  • step
    23
    Griffin House

    Repeat across the whole roof carcass, cutting loose ends to follow corner profiles.

  • step
    24
    Griffin House

    Fit roof corner trims and stick into place with solvent to hide corner joints. Mitre cut and glue plain cornices to upper edge, fill joints as necessary.

  • step
    25
    Griffin House

    Fit roof terrace railings to inside edge of roof.

  • step
    26
    Griffin House

    Assemble staircases - with one side laid flat on your work surface, fit individual treads flush to that face and dot with glue to hold temporarily in place. Fit second side after having flipped the staircase assembly. Once the whole stair is built, flood joints with glue and set aside to dry thoroughly. Choose staircase cutout desired from options on each floor and cut tags to expose hole for final position. Fill remaining slots if desired.

  • step
    27
    Griffin House

    Fill all joints and exposed corners. Prime entire model with spray primer - we recommend Halfords primer as it will stick equally well to styrene, resin, and wood. Leave to dry and paint as required with acrylics, oils, spray cans, etc.

  • step
    28
    Griffin House

    Assemble window frames with sashes. If required, windows can be modelled in partially open state by adjusting fit of upper and lower frames.

  • step
    29
    Griffin House

    Once dry, paint windows separately to give a cleaner finish before fitting dried, assembled windows into openings and glueing into place.